Final Project 2013
Principles and Practices / Project Management / Computer Aided Design / Project Development
The Project:
what will it do?
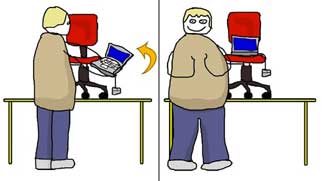
A standing desk that is environmentally reactive to light, and controlled by the user when required. It will improve the user's health by allowing them to be more active while at their computer. Everyone's awareness of our sedentary worklives means that people are looking for ways of improving our health and vitality - where 180 years ago it was realised that standing all the time wasn't good for your health and sewing factories invented sitting-down sewing machines, now we're realising that sitting down all the time isn't good for us all the time either. There needs to be a good mix of both.
who's done what before?
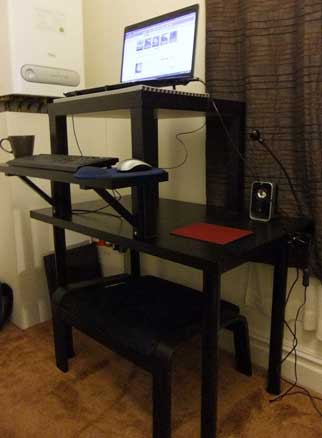
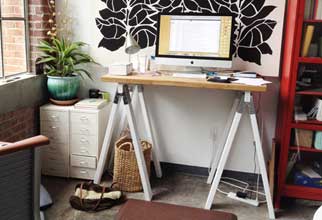
There are a number of standing desks on the market, like the ones on the left and the right above - the one in the middle is a particularly simple and instant idea that I like. One of the issues that I struggle with is the amount of cords for all my computing needs - how to tidy them up - and another is having the lighting that I need at different times of the day, or for different tasks. Also, these days my arms don't seem to be long enough to read some stuff without extra light.... or longer arms.
what materials and components? and from where? cost?
I am using 18mm BB grade birch FSC plywood that has 13 layers of plys, with a desktop of 24mm birch ply with an HPL black finish. I will use strips of LEDs and make programmable circuits for the lighting with a capacitor sensor. The Plywood is from Plytech in Auckland (at the top of my country) and most of the electronics stuff is from the Fab Inventory. The LED strip is from Jaycar, an electronics shop 2min walk away from Fab Lab.
what parts and systems will be made?
All of it?
what processes will be used?
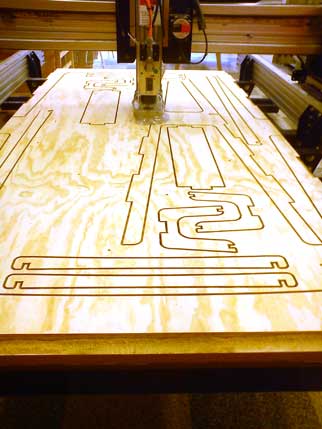
I shopBot the desk and do a bit of sanding to de-arris the edges and smooth the surface, but no rougher than 220grit sandpaper, as the finish on this plywood is good already. I design the circuits by breadboarding first, then create them in Eagle, modela the circuits, solder the components, and programme the boards.
what tasks need to be completed?
Successful programming of the eighth iteration of my circuit.
what is the schedule?
When our semester finishes next week and I have fixed all our machines, I will be able to concentrate on my Fab Academy studies. I will finish both my final project and the machine that Stuart and I are working on by July 29th.
how will it be evaluated?
By using it and getting other people to use it. By seeing whether people want to have their own desks?
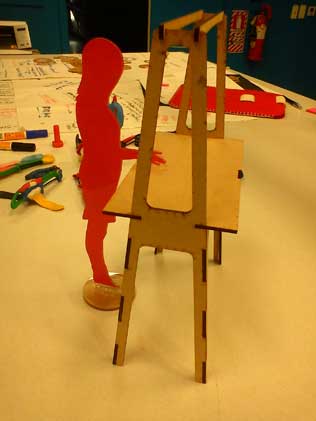
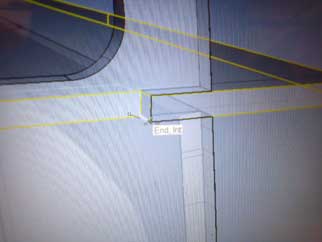
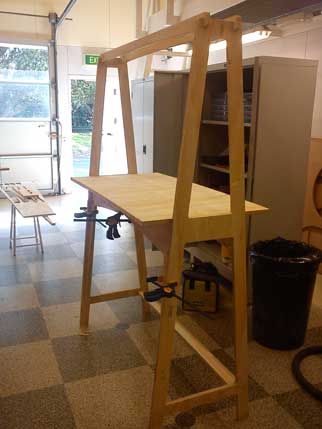
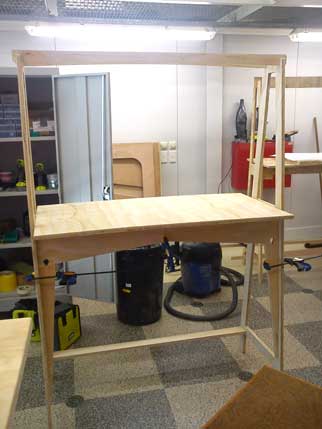
You'll remember from March, that I did the model above as part of the pressfit project. Moving the model from 2D to 3D was a lot simpler than I imagined - mainly because it is a planar model. After the 3D modelling of the eggcup, I know I have a lot to learn in that region. I have been working on this desk with one of our recent graduates, Ruben Norris, and he helped me with the basics of Rhino - see the screen shots below that show the process I followed.
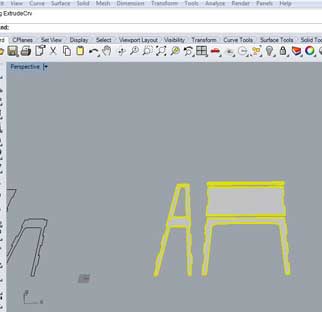
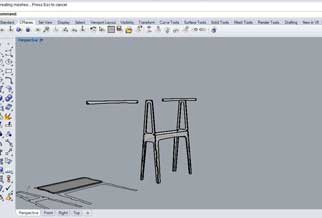
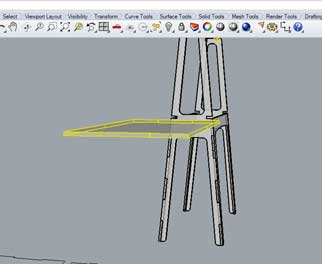
The final outcome in Rhino is below - we have called it the WeRu desk, which is a combination of the first two letters of both our names.
After making a couple of tests, we've ShopBotted up a couple of prototypes, without the lighting as yet. One of the administrators, Julie is testing one of them, and I'm testing the other. I'm planning to parametricise the desk so that individuals can have desks made specifically for them, without having to redesign the desk. It will also be useful to have parametrics for different thicknesses of material. It would be a good way to re-purpose the sheets of the shopBot bed, although my initial idea of making the WeRu out of one sheet of plywood hasn't been possible - the desktop comes out of another sheet, though you can fit four of them on.
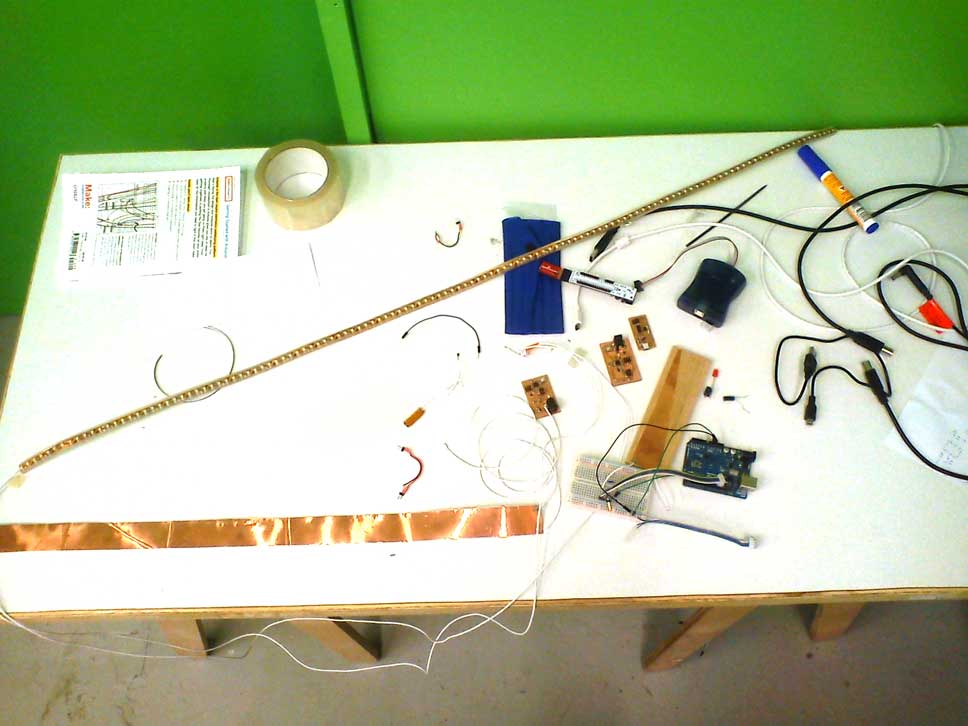
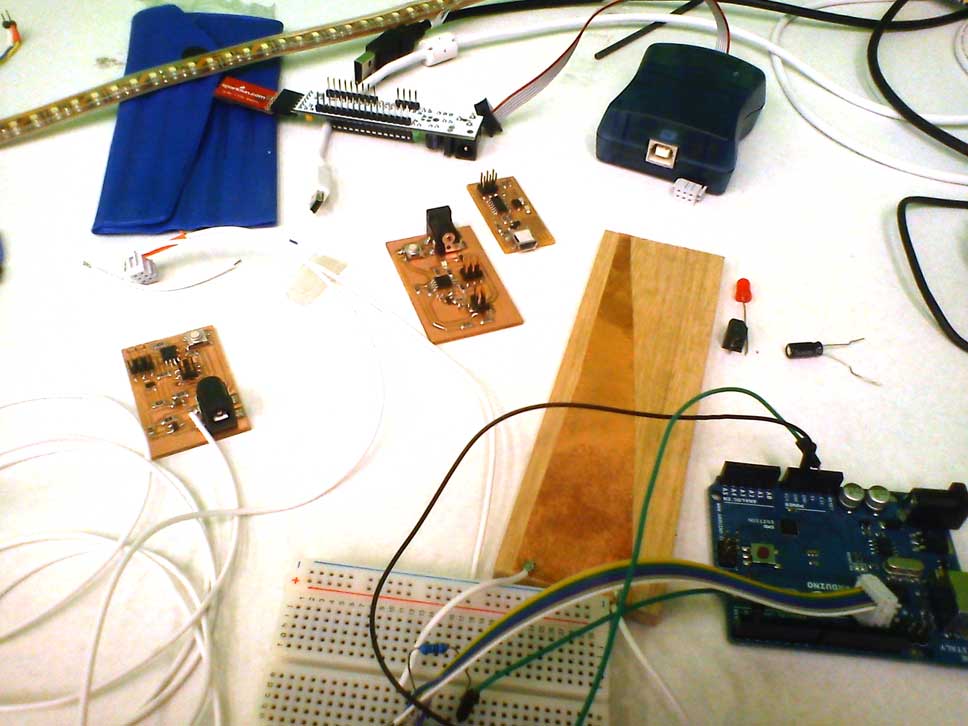
Playing with the idea of the lighting - spent a bit of time yesterday trying to get the lights working with resistance, but it's too unpredictable. I've got some LEDs which don't come with a Datasheet, so also did a quick test to see how they work. Good times.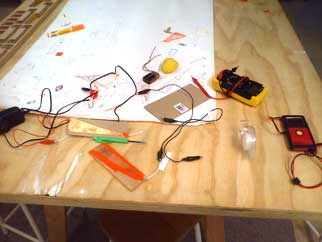
I look forward to understanding electricity better one day... I'm hoping it's like soldering, and suddenly you're good at it.
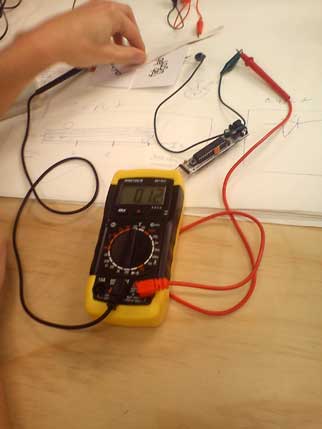
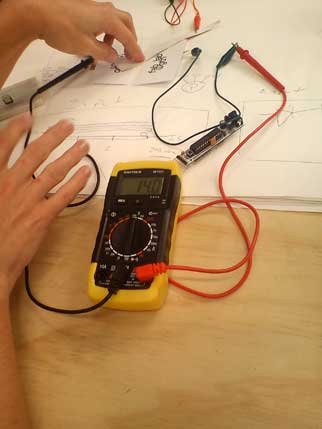
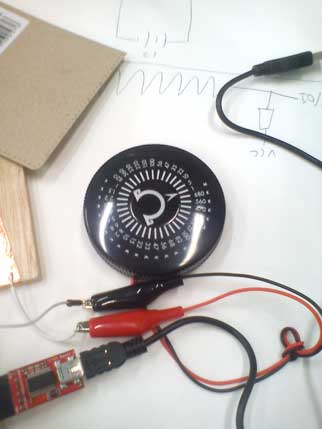
More experimenting with breadboarding and with the help of the lovely Craig, an electrical enthusiast from one of the makerspaces up the road, I've now got a capacitive sensor controlling the lights. I'm using arduino in the first instance, and we've got a great resistance gadget (below right) that we can just turn to adjust resistance. I've worked out that I need 680K resistance for my sensor to react in a range that is useful programmatically. Amidst all the mess of wires is a system that works: although patching together the programming from tutes is not the final solution, it's definitely showing the proof of concept.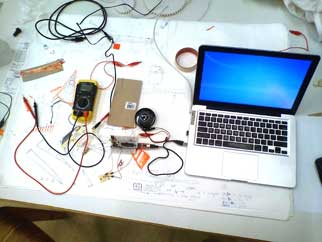
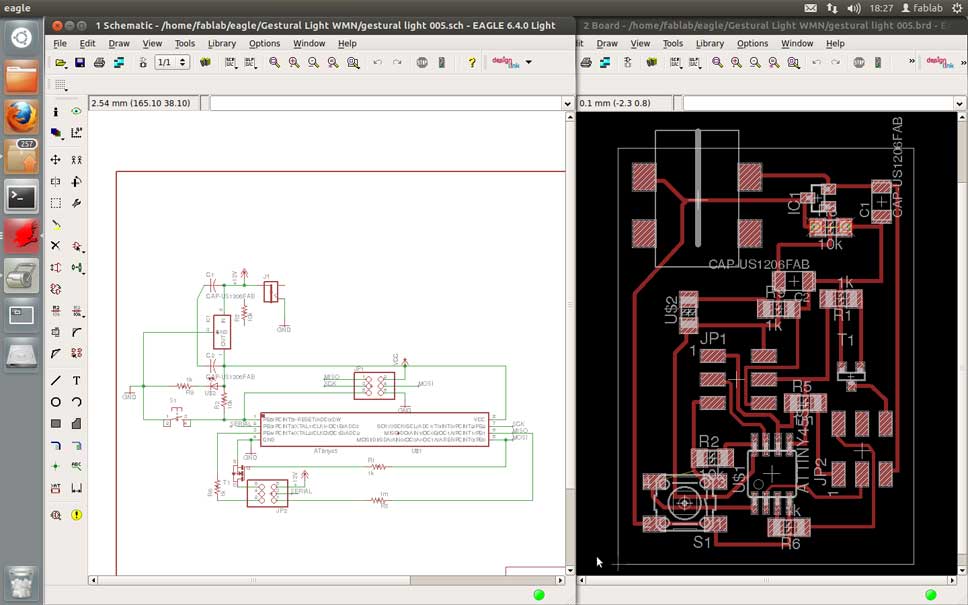
Now that it's working, time to move on to making the circuit.... drawing it in Eagle has its challenges, but handily Craig has used it a lot, so he has been invaluable again. Especially with his patience: supporting me to fumble my way around the programme without his mouse hand twitching too much. Managed to do almost everything without a hitch, though I accidentally deleted some of the library by pressing 'drop'...whoops. I've been using the Fab library, Neil's library and Ladyada's library to put together the schematic. I'm a bit messy and I'm still struggling with the difference between how the schematic looks and how the board looks. I suppose that's experience. Craig has only ever sent his circuits away to be made, so he is very keen to see the process we use here for making the boards. As you will see below, it's a big board, a beginners board. I hope to make the next one a bit smaller.
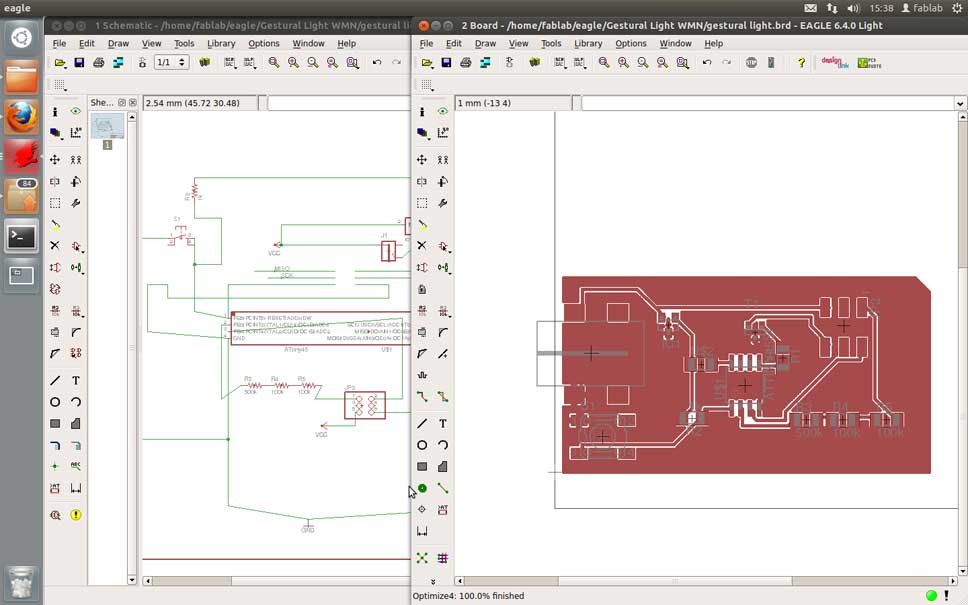
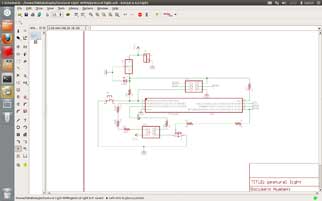
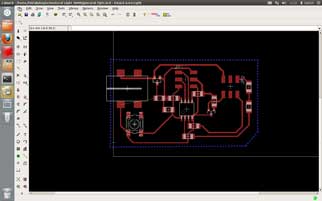
There are a couple of places on the board where I've had to jump - trying to fit the input and output on the same board and sneaking under this and over that- I have so much more appreciation for the boards we've been using in Fab Academy now that I've finally done one from scratch myself. The final drawing is so much tidier, thanks again to Craig. What a legend. I'm rapt to be using Eagle and hope to do more in the Composting project so that I don't lose my ability through not keeping it up.
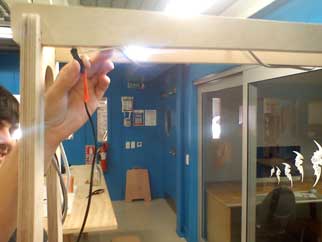
This lighting is my initial proposal for the desk, and acheivable for Fab Academy with my current skill level (only just...). I imagine that I'll do a number of iterations in the coming months to get different functionality as my confidence and understanding increases.
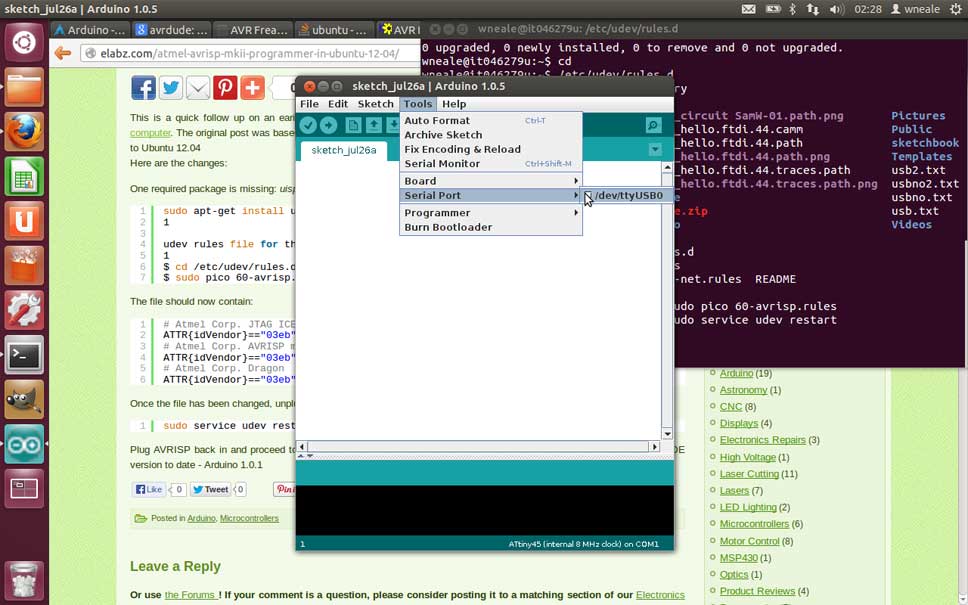
So, with days going by and unable to programme my board and have the lights work, I'm getting a little discouraged. Bas kindly offered a pep talk, so I had a chat with him after work last night (after work in the middle of winter for me, for Bas it was 7am on a summer's day). I've modified the board according to some of his suggestions, and am planning to set up a different computer today so that I can try one more time to programme using either the Fab ISP or the AVR ISP, this time in Ubuntu... *sigh*
The latest board:
I'm using vias to indicate where my jumpers are, because if I put resistors into my schematic and then ratsnest, I end up with a real mess as Eagle doesn't care that they're 0 ohm resistors. Bas has another way of dealing with it, which I'll try, because my method involves me moving to Illustrator to make the pads for the jumpers. Autoroute has become a thing of the past, and I'm enjoying the 'jenga' of working out all the connections and pathways. I hope that my boards become more beautiful soon.
Finding it incredibly frustrating spending weeks trying to get the board working when it breadboarded so easily, and have spent a similar amount of time struggling with getting the AVRisp to work on the Ubuntu side of my laptop with arduino. Success is sweet in one area at least - even Ken, our IT specialist, is impressed.
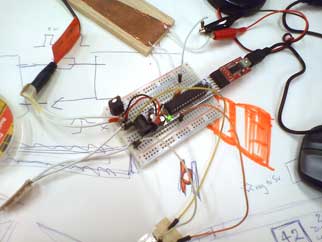
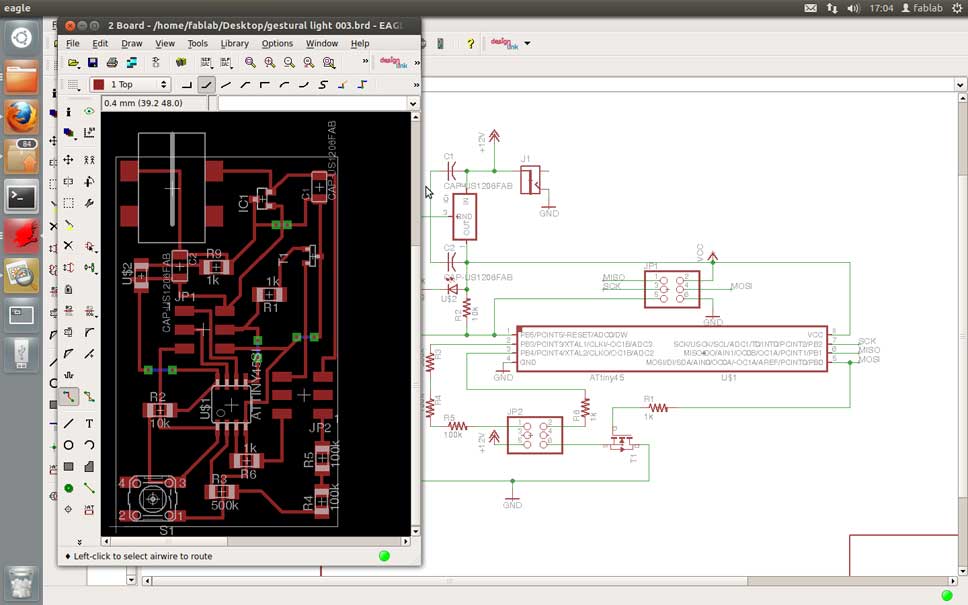
I've re-drawn the board, and made a new one - shifted a pin around so that we can get a serial print out of it to measure capacitance more easily now that the capacitor is bigger and I'm using the ATtiny instead of the UNO. It's still not as carefully packed as the boards we've made already, but it is a little smaller than my previous iterations.
Still not working - more software fixes - still not working. *Sigh* It's a pretty picture below though. I still struggle with the difference between the schematic and the board visually - I'm thinking about making a kit that you can use with Fab components to understand the change between the two. I've got only one jumper now, reducing the number of resistors and playing around with the layout, so that's satisfying. Eagle isn't impressed with an unfinished via and a floating 10k resistor but I get all the detail I need for cutting out the board. I still had to finesse it in Illustrator afterward, as there were some >0.4mm spaces that I can't yet work out how to adjust in Eagle.
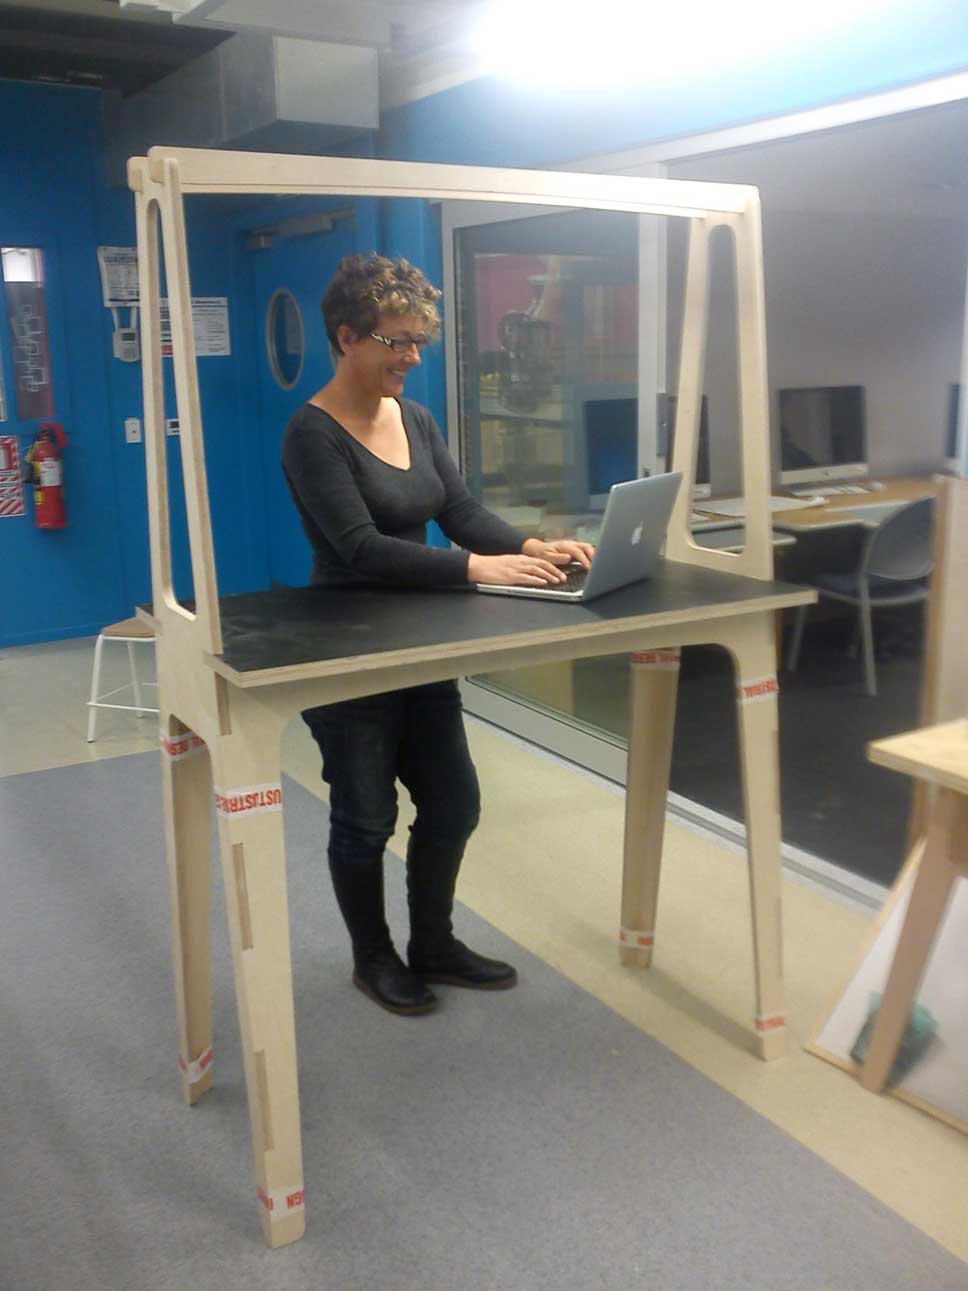
So, the WeRu desk is great. I'm standing at it now as I finish this page. It is the perfect height for me, and given that I move around a lot during my working day, it makes it easier to spend a bit of time on the computer here and there. Julie, who tested the original prototype, has a real version now which has been made specifically for her height. She loves it so much that her colleague has taken her old one to try. I have adjusted that for her height and she is also very happy. I have spent a bit of time with them talking about how to work like this - standing with your weight forward on the ball of your feet, taking mini breaks, only standing for three hours in the working day, and remembering to shift your weight between your feet occasionally (slightly rocking). When I adjust the desks for height, all I do is get people (or myself) to stand straight but relaxed with feet shoulder width apart, with their forearms parallel to the ground and their elbows close to their bodies. I then measure from their elbow to the ground and make the desk that high. In terms of the development of the desk, I've previously mentioned that I'd like to make it parametric so that these adjustments are easy. In terms of development of the lighting, I imagine that I'll get the lights done eventually, maybe even tomorrow, and after that happens there will be a number of iterations of these as my skills improve and I see what is needed and possible.
Here are the files for the WeRu desk, the board and schematic, and for the Arduino code so far. Although it isn't all working yet, I imagine I'll get there eventually... if anyone works it out before I do, please let me know. The last few months have been a real journey for me. I know so much more about the Fab Lab methods and ethos behind them than when I first started and am really excited to see how it influences me in the coming years. Living in an isolated corner at the end of the world can be really great but challenging, and it's good to know that there are people around the world who are on similar paths, who want to collaborate, share their knowledge and make the distance between us feel smaller.
Big thanks to Bas for his patience and humour.
I would have failed miserably and ripped out a lot more hair without the tutorials made and shared by Anna Kaziunas France, especially with the electronics. Thank you so much, Anna, you are a legend.